Azure Logic Apps
Azure Logic Apps is an Azure Integration Service (AIS) that provides you the ability to create and run automated workflows with little to no code. Consumption Logic Apps are developed using the visual designer within the Azure Portal.
If you are new to developing Azure Logic Apps, there is great Microsoft Learning material to get you started:
- What are Azure Logic Apps | https://learn.microsoft.com/en-us/azure/logic-apps/logic-apps-overview
- Introduction to Azure Logic Apps | https://learn.microsoft.com/en-us/training/modules/intro-to-logic-apps/
- Quickstart: Create an integration workflow | https://learn.microsoft.com/en-us/azure/logic-apps/quickstart-create-first-logic-app-workflow
Problem Space
Once you have created your workflow in the Logic App designer, your next question may be:
How do I consistently deploy the Logic App with my developed workflow?
We are going to be looking at conducting our deployment with ARM and Bicep templates.
ARM templates are a declarative way of defining Azure service configurations in code. When deploying services to Azure using ARM templates that are under source control and therefore in step with product development, are by far the best approach. The Azure services can be defined in a single template and that template can be used to deploy multiple copies of the system, either for dev/test purposes or to provision live instances for multiple customers in a reliable and predictable manner.
Bicep1 is a transparent abstraction over ARM template JSON and doesn’t lose any of the JSON template capabilities. Bicep templates will be compiled into ARM templates.
ARM Template Deployments
Following the Microsoft guide2 for both building an Azure Logic App using ARM templates and including the Logic Apps definition, you will likely end up with the following development process:
- Develop and Deploy a Basic Logic App ARM template:
Remember to add the template to your Source Control
{
    "$schema": "https://schema.management.azure.com/schemas/2019-04-01/deploymentTemplate.json#",
    "contentVersion": "1.0.0.0",
    "parameters": {
        "logicAppName": {
            "type": "String"
        },
        "location": {
            "type": "String"
        }
    },
    "variables": {},
    "resources": [
        {
            "type": "Microsoft.Logic/workflows",
            "apiVersion": "2019-05-01",
            "name": "[parameters('logicAppName')]",
            "location": "[parameters('location')]",
            "properties": {
                "definition": {},
                "parameters": {}
            }
        }
    ]
}
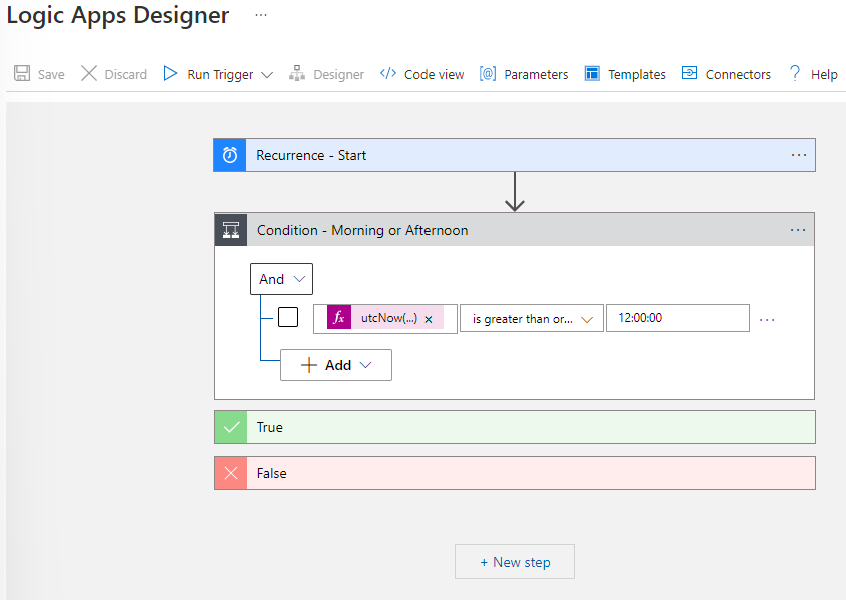
- Develop a workflow in the deployed Logic App Portal Designer:

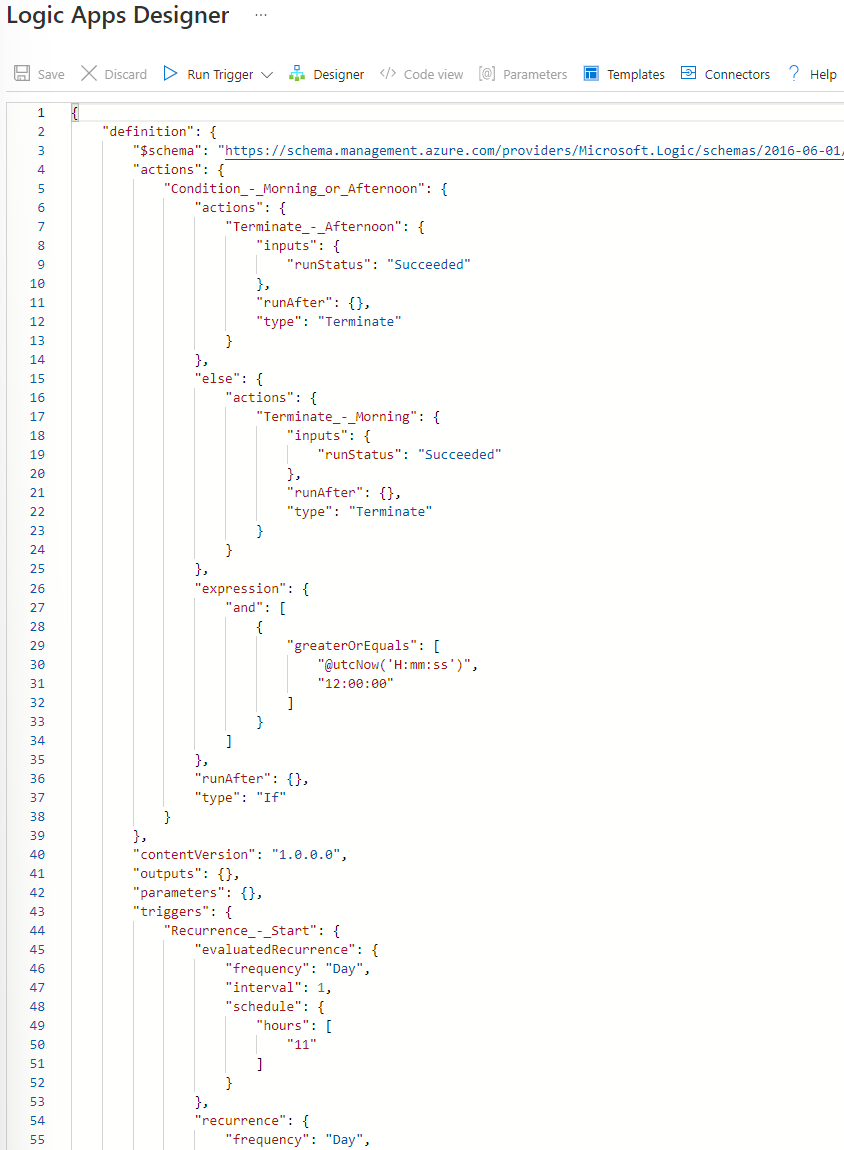
- Obtain the workflow definition from
Code view:
- Copy the workflow definition from the Portal into your Logic App ARM Template:
Make sure to parametrise fields within your workflow using the ARM Parameter syntax
{
    "$schema": "https://schema.management.azure.com/schemas/2019-04-01/deploymentTemplate.json#",
    "contentVersion": "1.0.0.0",
    "parameters": {
        "logicAppName": {
            "type": "String"
        },
        "location": {
            "type": "String"
        },
        "interval": {
            "type": "int"
        }
    },
    "variables": {},
    "resources": [
        {
            "type": "Microsoft.Logic/workflows",
            "apiVersion": "2019-05-01",
            "name": "[parameters('logicAppName')]",
            "location": "[parameters('location')]",
            "properties": {
                "definition": {
                    "$schema": "https://schema.management.azure.com/providers/Microsoft.Logic/schemas/2016-06-01/workflowdefinition.json#",
                    "actions": {
                        "Condition_-_Morning_or_Afternoon": {
                            "actions": {
                                "Terminate_-_Afternoon": {
                                    "inputs": {
                                        "runStatus": "Succeeded"
                                    },
                                    "runAfter": {},
                                    "type": "Terminate"
                                }
                            },
                            "else": {
                                "actions": {
                                    "Terminate_-_Morning": {
                                        "inputs": {
                                            "runStatus": "Succeeded"
                                        },
                                        "runAfter": {},
                                        "type": "Terminate"
                                    }
                                }
                            },
                            "expression": {
                                "and": [
                                    {
                                        "greaterOrEquals": [
                                            "@utcNow('H:mm:ss')",
                                            "12:00:00"
                                        ]
                                    }
                                ]
                            },
                            "runAfter": {},
                            "type": "If"
                        }
                    },
                    "contentVersion": "1.0.0.0",
                    "outputs": {},
                    "parameters": {},
                    "triggers": {
                        "Recurrence_-_Start": {
                            "evaluatedRecurrence": {
                                "frequency": "Day",
                                "interval": 1,
                                "schedule": {
                                    "hours": [
                                        "11"
                                    ]
                                }
                            },
                            "recurrence": {
                                "frequency": "Hour",
                                "interval": "[parameters('interval')]"
                            },
                            "type": "Recurrence"
                        }
                    }
                },
                "parameters": {}
            }
        }
    ]
}
- Any changes to the workflow in the Azure Portal Designer are to be reflected in your ARM Template that is in Source Control. You can use source control change tooling to see the diff between current and latest, this can help you retain parameterized values that you have previously included.
Bicep Template Deployment
Generating Logic App ARM Templates from Bicep is possible but has a different approach. Bicep is not written in Json as ARM is, and therefore you cannot simply copy the Json workflow definition into the Logic App deployment resource.
Following the example given by Microsoft3, their method is to write out the definition using the Bicep syntax and replace property values with Bicep properties as you would with ARM. This approach however does not adapt well to change, nor is it an easy task to bring the workflow definition across from the portal. Having to convert the workflow to Bicep syntax every time is simply a pain.
That said, hope is not lost.
Bicep has some built in functions that will allow us to retain a similar development process, such that:
We will still run through steps 1, 2, and 3 as we have done for ARM, but this time with Bicep.
/************************
Logic App Template Bicep
**************************/

targetScope = 'resourceGroup'

// ** Parameters **
// ****************

@description('Logic App Name')
param logicAppName string

@description('The location that the resource will be deployed to')
param location string

// ** Variables **
// ***************

// ** Resources **
// ***************

resource logicAppDeployment 'Microsoft.Logic/workflows@2022-10-01' = {
  name: logicAppName
  location: location
  properties: {
    definition: {}
    parameters: {}
    state: 'Enabled'
  }
}

// ** Outputs **
// *************

output LogicAppName string = logicAppName
Rather than copying the workflow definition into the Bicep template, copy the definition into a
new Json filein your source control repository.As you do not have access to your Bicep Parameters, any values that need parametrising will need to be replaced with tokens that will be replaced by the Bicep Template. For instance, **interval**.
Next we will load our workflow definition into the template, conduct token replacement with Parameter values, and then assign the definition and parameters to the Logic App Resource.
The Bicep Functions that we will be using to conduct these activities are:
- loadTextContent | Loads the content of the specified file as a string. | https://learn.microsoft.com/en-us/azure/azure-resource-manager/bicep/bicep-functions-files#loadtextcontent
- replace | Returns a new string with all instances of one string replaced by another string. | https://learn.microsoft.com/en-us/azure/azure-resource-manager/bicep/bicep-functions-string#replace
- json | Converts a valid JSON string into a JSON data type. | https://learn.microsoft.com/en-us/azure/azure-resource-manager/bicep/bicep-functions-object#json
See the Example Below:
/************************
Logic App Template Bicep
**************************/

targetScope = 'resourceGroup'

// ** Parameters **
// ****************

@description('Logic App Name')
param logicAppName string

@description('The location that the resource will be deployed to')
param location string

@description('Trigger Interval')
param interval int

// ** Variables **
// ***************

var logicAppDefinition = loadTextContent('./Definition.json') // Load our definition into a string variable
var logicAppReplacementParameter = replace(logicAppDefinition, '**interval**', interval) // Replace tokens with our parameters
var logicAppDefinitionJson = json(logicAppReplacementParameter) // Retrieve the Json object from the Json String so we can access specific data when assigning

// ** Resources **
// ***************

resource logicAppDeployment 'Microsoft.Logic/workflows@2022-10-01' = {
  name: logicAppName
  location: location
  properties: {
    definition: logicAppDefinitionJson.definition // Set the definition
    parameters: logicAppDefinitionJson.parameters // Set any Properties that may be set
  }
}

// ** Outputs **
// *************

output LogicAppName string = logicAppName
- As with the ARM templates, any changes to the workflow in the Azure Portal Designer are to be reflected in your Json Workflow file that is in Source Control. You can use source control change tooling to see the diff between current and latest, this can help you retain tokenised values that you have previously included.
Take Note When
- Special point of care should be taken if your logic app is using xpath expressions, proper concatenation/interpolation of the quotes can be a nightmare.
- Bicep loadTextContent has size limits: The maximum allowed size of the file is 96 Kb.
- If you are meeting these size limits for your workflows, this may be an indication that you need to split your workflow up.
Summary
Whether you choose to build your resource deployment templates with ARM or Bicep, both options as shown will provide you a development process where you can keep your low code consumption Logic App not only in source control, but have a reliable deployment template that will allow you to create your Logic App when and where ever you wish.
What is Bicep | https://learn.microsoft.com/en-us/azure/azure-resource-manager/bicep/overview?tabs=bicep ↩︎
Automate deployment for Azure Logic Apps by using ARM Templates | https://learn.microsoft.com/en-us/azure/logic-apps/logic-apps-azure-resource-manager-templates-overview ↩︎
Automate deployment for Azure Logic Apps by using Bicep Templates | https://learn.microsoft.com/en-us/azure/logic-apps/quickstart-create-deploy-bicep?tabs=CLI ↩︎

